Pages

Showing posts with label Sundry Sewing. Show all posts

Tuesday, December 14, 2010

Our Christmas Stockings

Have you ever desecrated a perfectly good cabled sweater? I have.


Twice.


That one was from Ireland. Yup. An Irish cabled sweater. And I felted it and its cousin from England, cutting off their sleeves afterwards.


But why?? Dear holy Patrick, saint of wet and windy weather…Why???

THOMY and I are starting a tradition this year. We are filling stockings for each other with all manner of goodies and trinkets. The snag in our plan was that we didn't have any stockings.  Sooo, I found a lovely little pattern on Martha Stewart's website. Literally, it's little. I enlarged it…


Then I enlarged it again manually, taping the pieces to some cereal box cardboard I have handy. And I photocopied that mock up.


I had to sketch a few lines to reconnect the pieces, but I made sure the pattern fit the smaller set of sleeves.


Both stockings cut out and pinned together:


Both stockings done!


I know. Our stockings have cankles. But all stockings have cankles. So there. What is awesome is I was able to use the sleeve cuffs as the stocking cuffs, too.  I'm also jazzed that I was able to use two scrap cable lengths as the hanging loops. I just zig-zagged the edges and sewed the loops on by hand.  (Because, you know, it's a virtue to salvage every last bit from a perfectly good sweater one has just cut into.)

I didn't line the stockings, and I probably won't unless the aforementioned trinkets poke through, such as a diamond stick pin.  They could do that.

Thursday, July 22, 2010

I was pressing board challenged

…because I don't have room for one in my sewing grotto. I used to have an ironing board, the scissor-legged kind, but I gave it up for more storage room. You see, I'm ill. I have towered stashes of fabric, yarn, and beads. Then I acquired a treadmill that needed a niche, so into a corner it went. This space greed is probably a sickness from which I'll never recover, though I might have a sporting chance if I had a pressing surface on which to flatten the aforementioned fabric and sew it into fabulous creations.

Last year, I rearranged my sewing area and planned to use my UFO cart as the base for a new pressing surface.


(My stepfather-in-law made this for us when we lived in our first house. The kitchen had next to no counter space, and this cabinet was oft dusted with flour or mashed potato flakes.)

I wanted an ironing board that could be removed and that came up to the proper height for me according to the ergonomic guru my quilt guild hosted. I needed about three inches more in elevation.

So, I measured the top of the cabinet and gathered my supplies.


  • 3/4-inch plywood cut to size by the saw master at the big box store.
  • Scrap batting, enough to cover the board's surface in a double thickness. (I used a wool batting because it's what I had. If I'd had big enough pieces in cotton batting, I would have preferred that.  Polyester would melt, of course, and that's a big no-no.)
  • Teflon fabric, enough to fold to the underside of the board on all sides.
  • At least four, small bun feet meant to be screwed in.*
  • At least four straight mounting plate kits.*
  • Staple gun with 1/4-inch staples
  • Electric drill with proper sized drill bit and Philips driver bit, or a really strong hand to work in the screws manually.


*I bought five because I thought I'd need more support in the middle of the board, but the 3/4" plywood is sturdy enough…as long as I don't set my entire fabric stash on top of it.

In keeping with all the tutorials I've read about upholstering a flat surface, I layered the teflon fabric (face down), the two thicknesses of wool batting, and the board on top. I wrapped the teflon fabric around the edges, working one edge and then it's opposite to stretch the fabric tight, and I stapled as I went.


Here's how I folded one corner.


Doesn't that look tidy? The board fits snug inside the lip around the cabinet. I could've stopped there, but it still needed more height. So on with the mounting plates and bun feet.


Voila!


I think one thing I'll add is some no-slip shelf liner cut to fit the bottom of the bun feet.

And, look! More storage space.


Linked up to

Sunday, July 18, 2010

Hanky Haul (Part 2 of What a Bargain!)

At this very moment I'm watching a singer on tv who barely moves her mouth. Ironically, that's what I'm about to do in this post. Writing-wise.

I took lots of photos of hankies. Photos of hankies--at least my photos of them--are not impressive visually. And what did I do to them in post-production? Turned them into Polaroids. Even better.

But that meant I got to write each photo's caption in the large white margin of the "Polaroid" frame, just like when I was a kid. So, without further blabbing, here is the hanky haul in its entirety and a few of the hankies I especially like.  (By the way, the What a Bargain part of this hanky pile is that the hankies were a dime each.  I know!)

Hanky Haul roid

Reverse Applique Hanky roid

Appliqued Hankies roid

Embroidered Hankies roid

Crochet Cutwork Hankies roid

Tablecloth Hanky roid

18th Birthday Hanky

Graphic Floral Hanky roid

Kansas Hanky roid

And as a bonus…

Rick Rack roid

By the way, the free software that converts photos to Polaroid-esque throwbacks is Poladroid.


This post is linked up at

Sunday, July 11, 2010

What a bargain! I think I will buy some. (Part 1)

When the stepmother of a friend passed away, she left behind an impressive collection of vintage linens. They weren't her family's heirlooms; they were simply pieces she'd accumulated over the years from estate sales and the like. My friend has been entrusted with the task of sorting through the stash to sell it, so she asked those of us in her small quilting group if we would like first dibs on what she and her dad had found so far.  (Yeah, so far.  Apparently, my friend's stepmom squirreled away things everywhere, so they're not sure when they will find it all.)

I went to take a look at the assortment last weekend. All the linens are in a spare bedroom, in boxes and on tables and the floor and overrunning the bed. Dresser scarves, table cloths, dish towels, napkins, doilies, hankies (the reasons why I was there), and gobs of other embroidered, embellished, and otherwise spiffied workaday fabric finery were all over, though each and every one of them were arranged in an orderly fashion.

I took home two (2) grocery bags worth of stuff. All for $20. I'll show my hanky haul in a later post, but in this one I want to share what was in a box of handmade trims my friend threw in for thirty cents. There are a few mystery pieces, which I show at the end. If you know what they are, please leave me a comment giving me a heads up.

First, some long pieces of filet crochet.

Filet Crochet Trims

I think some of these are meant for pillowcases. The top, thinner one actually rests better in a circle, so I'm guessing it was meant for a neckline. The two trims wrapped around tubes are tatted. The filet crochet piece between them, with the ribbon running through it, looks like it could be a sachet since it has a front and back and is stitched together around the bottom.

A close up of the tatting.

Tatted Trim

Filet Crochet Butterflies

What does one do with filet crochet butterflies?

Crocheted Bodice

This isn't the mystery piece, but I was puzzled by it. It looks like it could be a bikini top, huh? I wonder if it more likely came from an era when lace adorned dress bodices. Or maybe it's the top of a nightie. Was there a bride somewhere down the corridor of history who didn't get this in her trousseau? (I'm talking out of my ear, of course. I have no inkling what kind of clothing this beautifies.)

Finally, the head-scratcher.

Mystery Filet Crochet

I arranged these four things in a cross just to take the picture. I don't know how they're actually put together. Each one appears to have an upper tab, whether it be pink, blue, or white. One of my friends suggested they are scallops in a larger and never completed piece. She also wondered if they're dresses for a kind of filet crochet Sunbonnet Sue. It all sounds good to me because I am clueless. What do you think? If you don't know, make something up and jot it down in the comments anyway.


I've posted this to

Sunday, July 4, 2010

Happy Independence Day and lessons learned from a bulbous-bottomed bag

A bag I began knitting in February, my Lucy Bag, is done. The bag isn't difficult, but I was disappointed in my little experiment and didn't want to face my deformed creation. A Lucy bag is supposed to look like one of these. Instead, I ended up with this:

Lucy Bag

I knitted a stranded colorwork basket weave in the middle. I had not tried colowork like that before so I didn't know that I would knit it more tightly, apparently, than the rest of my plain stockinette gauge. As a result, the design shrank into a green girdle when I felted the bag. Closer look?

Lucy Bag closeup

It looks like a gourd, no? Well, I was bummed, though not surprised that my full-speed-ahead approach didn't produce something staggeringly beautiful. I sent it to time out for many a moon, but assured it that I wasn't going to let it languish; I bought lining fabric, something slippery since I promised I would use the bag for projects and I don't want the yarn of future shawls and scarves to stick in the bag's gullet.

Lucy Bag liningLucy Bag lining closeup

So, the lessons learned:
  • Use larger needles when switching to colorwork from stockinette, and
  • Trim fingernails before working with slippery fabric. Snag snag snag.

By the way, the button? A ceramic find at Jo-Ann Fabrics. Its colors match much better in person than in photography.


I've linked this post to:

Thursday, June 10, 2010

Knitting swap loot and a view from the soapbox

Recently I participated in a knitting swap based on the upcoming Eclipse movie. It's theme? Team Edward vs. Team Jacob. Since I know how the story ends, I sided with the romantic winner, the very Mr. Cullen. This is what my swap partner sent me.

Team Jacob v Edward swap gift to me

My partner is Martha of Green Mountain Knitting Bags fame. I've yearned for one of her bags nigh on...ever since I've seen them many moons ago. Now I have one. In blue. And I now have blue Ella Rae Lace Merino. And blue curly wool to make more thrummed mitts whenever I feel like it. Sense a favorite color theme? The necklace in the photo, by Jenifer Smith, is supposed to be a choker made to look like a bite mark. Alas, my neck's girth makes this subtle bit ot bling into a better bracelet, so that's how I've been wearing it.

In exchange, I sent Martha a shawl in wolfish colors, since she is on Jacob's side.

Team Jacob Multnomah Shawl 1

It's the Multnomah Shawl pattern, and the yarn is off a cone--one of two cones--from Spun Fibers Inc. Rocky Road is the yarn name, and London Town is the colorway. I have over 15,000 yards of this yarn. Yeah.

IMG_3619

See? Lots and lots of it to be had.

Team Jacob Multnomah Shawl 3

The shawl pin came from The Shawl Pin Store, thank you very much Google. The mother of pearl circle, cut off-center, is reminiscent to me of an eclipse. So, cute, huh? See what I did there?

I also did these stitch markers to play on the theme.

Eclipse stitch markers

You might not believe it from seeing these pictures, but I'm not hyperventilating to see the Eclipse movie. I'm fond of the "saga" and all, but I can definately wait until the fervor dies down to see the flick. I'm thinking that part of the reason for my indifference, after noticing all the Twilight merchandising that's been peddled in the last couple years, is based on burnout. I mean, people...werewolf pack tattoo PACKING TAPE? What? Did Bella use this stuff when she was moving out of Charlie's house?

I'll nip this rant in the bud right here. Suffice it to say, I like the story but can do without the peripheral drama the movie has stirred up. I will add, however, that I love the handmade stuff based on the books. I'm DIY biased, of course. Buying it by hand may be faster, but making it by hand is usually more entertaining...and proof via hard work that one is sincerely nuts about something.

Linked up to:
--  Just Something I Whipped Up Mondays

Thursday, June 3, 2010

What I did during my summer cold

Professionally, My dad was an auto mechanic. As a hobby, he tinkered. He liked to weld, re-engineer, and generally make do with what he had on hand to solve a problem. (For example, in his later years, he bent leftover metal siding to make a remote control holder which he attached with hose clamps to his torchiere lamp.) What he had on hand was a lot of doo-dads, widgets, and hoozywhatsits, all mostly metal. Some in metric sizes. All this assortment of little things needed organization, and I'm not talking baby food jars screwed to a board. Oh no, Dad's accumulation of bolts, washers, and nails far surpassed that meager means. With access to empty cans of chemicals needed to keep cars running, he fashioned himself an tinkerer's chest of drawers.

Gas can drawers

Gas can drawers closeup

We inherited the entirety of his collection. We didn't really sort through everything before moving it out of his garage and into ours because we needed to sell his house before it aged another fifty years. But I think his desire to make his collection useful to him rubbed off on me recently. I sorted my button stash.

Uh, yeah, that's right. I sorted the button stash. Two large jars and three small ones. I think lots of times jars of mixed buttons are kept around as home dec curiosities, but I have dipped into my stash often enough to feel how much time I have wasted looking for just the right color...or something remotely close enough.  So, when I came down with a cold last week, I finally spilled the buttons into an old stew pot and set to work sorting them. It doesn't take much physical effort or mental acuity. Just time.

And because I didn't want to re-use the huge jars--what would be the point of sorting the buttons just to throw them all together again--I made use of a collection I inherited from my mom:  smaller wire-bail canning jars.

Red Button Jar
The red buttons in a half-pint jar.

Blue Button Jar
The blue buttons in a green glass jar.

Button Stash
The stash.

Useless Generalized Statistics:
I have buttons made of bone and mother of pearl, early forms of plastic, porcelain, glass and wood. I have buttons on cards from defunk manufacturers and with price stickers from stores long since closed. I have tiny buttons one would expect to see on a bride's gown and giant buttons no self-respecting button hole would encompass. Lots of black buttons, even more white/cream buttons that I sub-divided into ones with two holes or four. The colors with the least amount of buttons are orange and purple.

So now I have a working stash of buttons. Me, the one who doesn't get along with button holes (see previous post). But as you can see in that previous post, I don't need no stinking buttonholes to use the buttons I have.


This post is linked to:

Saturday, May 29, 2010

Hand Wash Cold, Line Dry

As a wearer of hand knitted socks--some wool, some wool blends--I have been hand washing these precious pairs to save them from the ravages of the washer and dryer. (Read:  To save them from being felted.) The thing is, I haven't had a place to keep the socks separate from the rest of the laundry except for on a shelf next to the bed.  Imagine the beauty of hand-knit, dirty socks piling up in plain sight.  Truly a travesty for a modern, renaissance homemaker such as myself. 

I simply had to find a solution.

Or (ahem) I had to create a solution when I ran across the tutorial for a clothespin bag at 
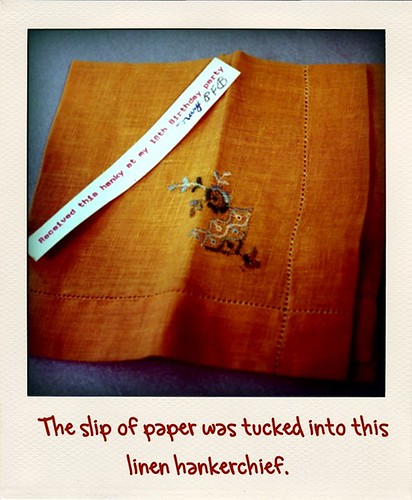
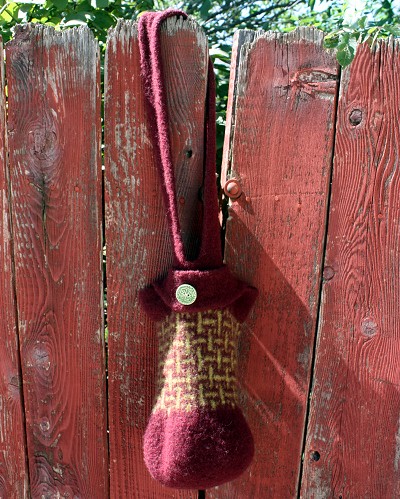
My Lucky Chicken.  I modified the instructions a bit to make a bag befitting several pairs of bulky socks, and I added an embroidered patch on the front.  I've detailed my modifications below, but for now, for the sake of those visiting from 
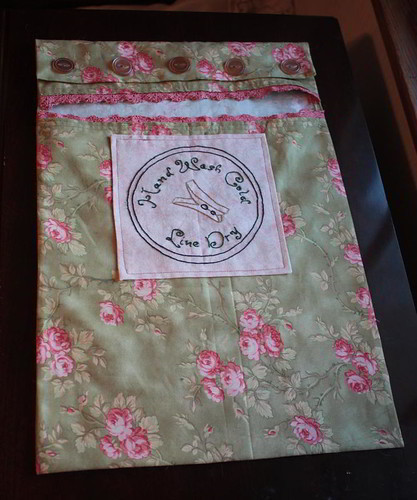
Sew & Tell Friday, here's the finished product:

Hand Wash Cold bag

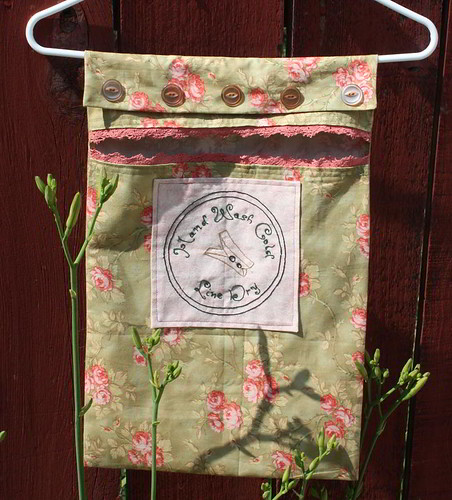
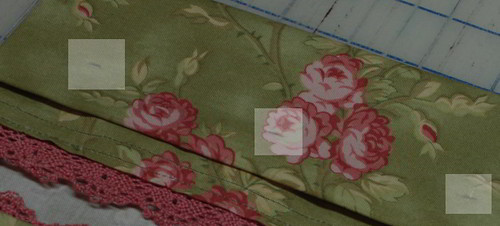
On the hanger, it's about 12" x 19".  Rather than beginning with a fat quarter, as the instructions suggest, I had yardage to work with.  So I cut off 13" from selvage to selvage and then sliced off the selvage edges themselves.

Hand Wash Cold bag 1b

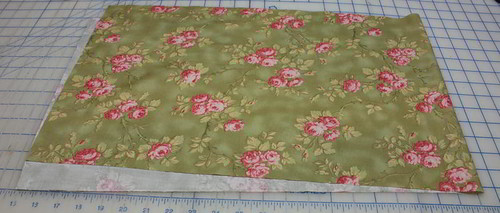
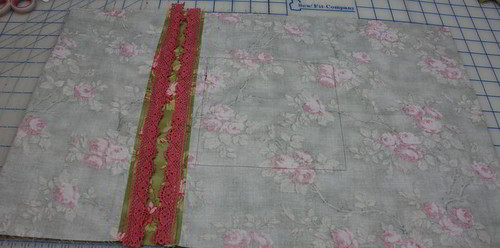
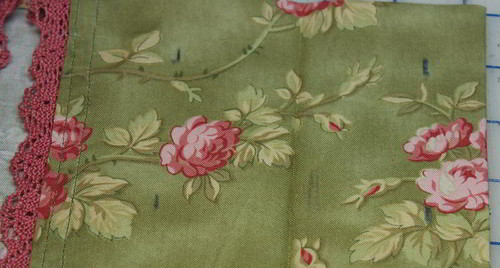
I hemmed the short edges and added the pink lace trim.  About this time, my sewing machine broke.  Or, rather, I helped it along when I got tired of the needle not aligning itself correctly, ka-chunking itself through the fabric,  Hoping the problem could be solved by something simple, I tried to clean out all the fuzz from under the throat plate and from around the bobbin housing.  Somehow, however, I think I didn't replace all the parts correctly, and now I get a loopy mess under the fabric when I try to sew, and everything binds up.  Also, the needle still hits the edge of its opening in the throat plate--any needle does this;  it drives me crazy.

I wasn't thwarted for long, thankfully.  I pulled out my Featherweight and finished the bag.  I had planned to zigzag the embroidered applique onto the bag, but straight stitching became the order of the day.

First I folded in the edges of the patch and then folded the corners into points.

Hand Wash Cold bag 4

Hand Wash Cold bag 5

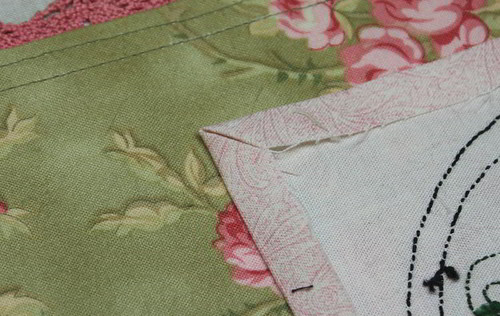
I top stitched around the patch and then folded the bag into its parts, right sides together, so I could sew the long edges closed.  I folded the top down about 7" and then folded the bottom up to meet the top edge, but I don't have a precise measurement for that.

Hand Wash Cold bag 5b

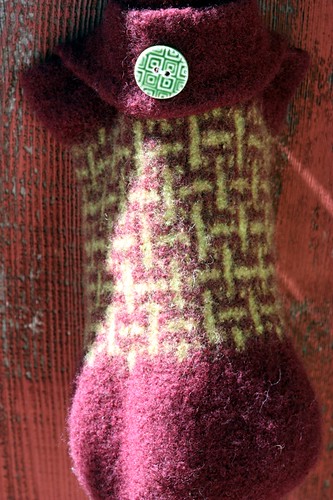
I sewed the long edges and flipped it inside out.  The clothespin bag at My Lucky Chicken has button holes and buttons as its closure for hanging from a line or hanger.  My featherweight isn't button hole friendly.  Quite frankly, neither am I.  So I added large snaps and sewed buttons to the front as decorations.

Hand Wash Cold bag 8

Again, I don't have a measurement for how far I folded this flap; I just eyeballed it.  I marked the placement of the snap components by slipping a folded sheet of dressmaker's carbon paper underneath the flap.  As I marked the top of the flap, corresponding marks were made underneath, so that all the places for buttons and snaps were marked at the same time.

Hand Wash Cold bag 7
Marks in pencil for the buttons.

Hand Wash Cold bag 6
Blue carbon paper marks for the snap components.  (This is a sideways view.  The top of the flap is on the right in the photo.  The fold runs down the middle.)

And, here's the bag again, all done.  The bedside shelf is now safe from stinky, handmade socks.  Thank you, My Lucky Chicken!

Hand Wash Cold bag inside

I've Linked to:

LinkWithin

Related Posts with Thumbnails