I'm using my Reading Kimono's multicolored placket in the tutorial. It's got several color changes, so there were lots of ends to weave in. Pictured is the color change from yellow to green. This entry is image intensive, so bear with my blog!
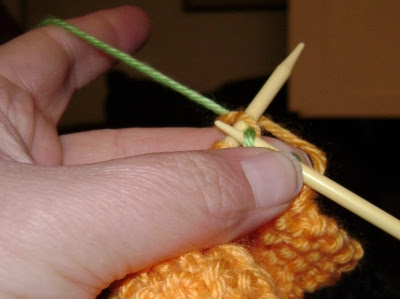
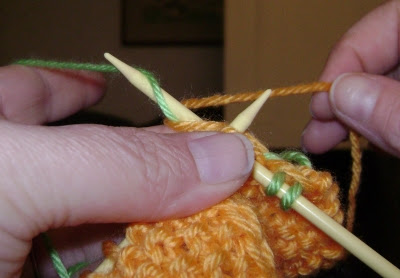
1. The green yarn is the color change, the working yarn, so it is held in the left hand. The yellow tail is held in the right hand.
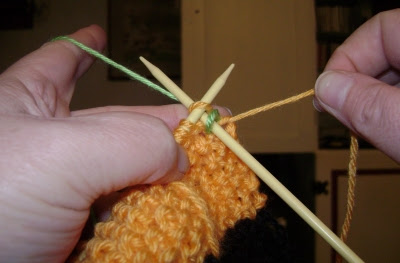
2. Insert the right-hand needle knitwise into the stitch on the left needle. Wrap the yellow yarn tail in front and around both the working yarn and right-hand needle.
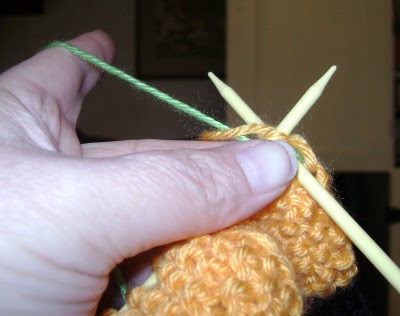
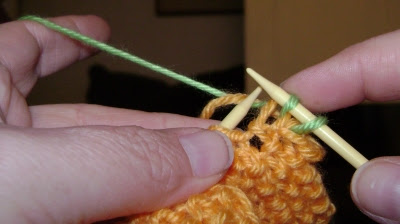
3. You don't need to tighten the tail like it is shown here. I just want you to see that the tail wrapped clockwise around the right needle and working yarn.
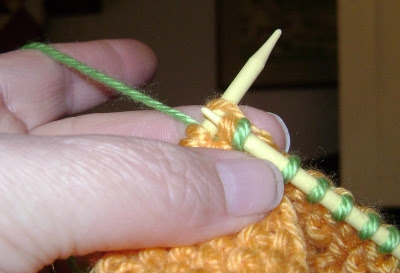
4. Wrap the green working yarn around the needle counter-clockwise (or how you usually do when making a knit stitch). It should still be underneath the tail yarn which is wrapped in the opposite direction around the needle.
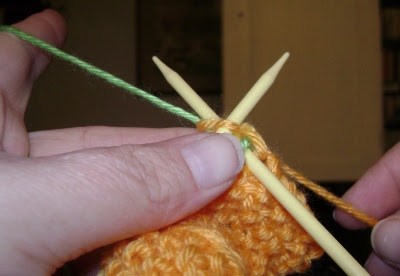
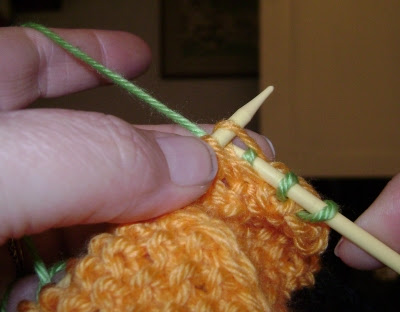
5. Bring the new, green stitch forward through the stitch on the left needle. The tail yarn may try to come through, as well, but make sure it's only the working yarn that ends up on the right needle...
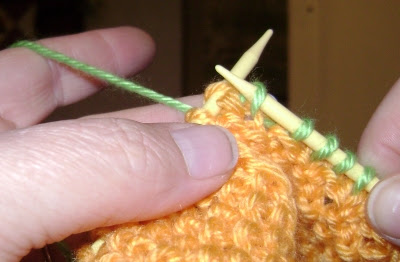
6. ...as you separate the needles and pull off the yellow stitch from the left needle.
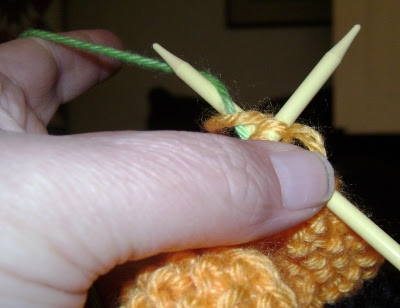
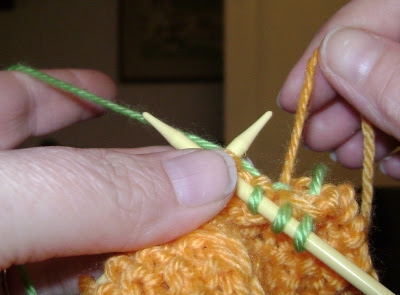
7. Knit a stitch in the usual manner for continental. This will anchor the tail yarn in place.
8. We're now ready to repeat step 2.
9. And here are steps 2-4 completed again.
10. This is what it looks like when the tail yarn is accidentally pulled through the stitch on the left needle. Let the yellow tail yarn fall off the right needle's tip and continue creating the green stitch.
11. Like this. Then repeat step 7.
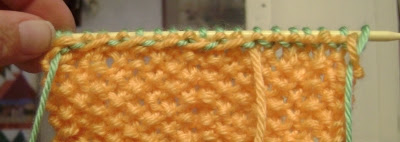
12. When you have made a few sets of these stitches, the back of your work will look something like this. The end is woven in, and I suppose you could snug up the yarn to make it blend in better. In my case, I didn't need to because I was going to fold this strip down the middle, wrong sides together, to create my cardigan's placket.
And there you have it. Now, since I'm a skosh neurotic, I went back to all the woven-in ends and "back stitched" each loose end through a couple of its previous stitches. It was probably overkill, but this is my way.
Thanks so much for pointing me to your tutorial! I've been meaning to edit my old post and finally have with a link to your blog :)
ReplyDeleteI'm just learning/practicing continental knitting, so this is awesome and timely for me-- thanks!
I have been using Sock Porn's English/American tutorial, but just learned how to knit continental, so this is great! thanks!
ReplyDeleteThat's pretty much how I do it too - nice tutorial! I always weave back again, and sometimes back and forth a couple of times - keeps the yarn from travelling as the garment stretches with wear
ReplyDeletethis is the best thing i have learned since continental knitting itself. thank you so much!
ReplyDeleteThank you for making the effort to pass your skill onto others. I found your tutorial very helpful and can now weave in tails while knitting.
ReplyDeleteRan across this and just wanted to thank you for "unventing" this!
ReplyDeleteThis is going to be super useful when knitting stranded colorwork, so I can weave in long floats with either hand (one color held continental-style, the other held english-style).
I don't, but that's because my tutorial is the complement to SockPr0n's original tutorial for English knitting. The link for that tutorial is near the beginning of my post above, but the full address is http://sockpr0n.blogspot.com/2006/10/how-to-weave-in-ends-while-knitting.html.
ReplyDeleteThanks so much for this tutorial. I totally will be trying this on my next project, which will involve stripes. Anything that speeds up the process is a huge plus in my eyes.
ReplyDelete