What you'll need to make four coasters:
- 4 CDs or DVDs
- A fat quarter (18" x 22") of fabric, preferrably with a weave tight enough so the CD won't shine through it. I used 100% cotton from my quilting fabric stash.
- Four 4 3/4" squares of felt or a needle-punched batting. (I used 100% cotton batting since I have so many scraps of it. The needlepunching is a factory treatment of the batting that stabilizes the fibers.)
- Thread that's strong enough to pull without snapping.
- Needle
- Embroidery floss that matches your felt/batting
- PDF of the coaster templates or two circle templates measuring 6 1/4" and 4 1/2" in diameter, respectively.
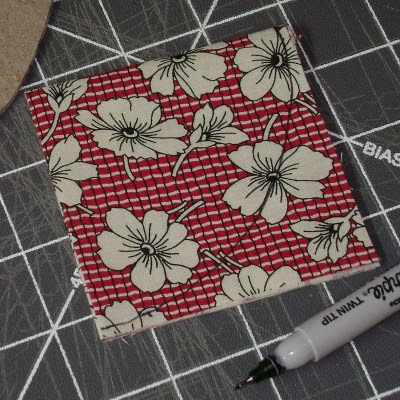
1. Cut four 6 1/2" squares from your fabric.

2. Fold each square in half and press. (In the picture, ignore the creases going from the folded edge to the cut edges. I had already completed all my pressing before I remembered to take a picture of each step.)

3. Fold each rectangle in half again, meeting short ends, so that the squares are folded into quarters. Press.

Repeat the following steps for each coaster.
4. Using the larger template, line up the folded edges of the fabric to a quadrant of the perpendicular lines.

(Note: If you'd rather just cut the template into four pie slices and use the straight edges of one of the slices in this step, then more power to you. I thought of this later and I believe it would be easier. But I was too lazy to go back to cut my template and reshoot the photos.)
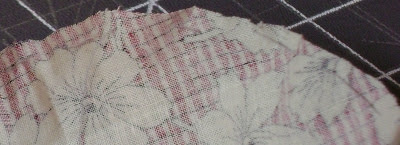
5. Flip the set over and trace the rounded line.

Like this.
6. Cut along the line and unfold the circle.


7. Cut off an approximately 18" length of thread and thread your needle. Sew a basting stitch around the edge of the circle, keeping your knot to the wrong side of the fabric and ending your last stitch to the right side of the fabric.

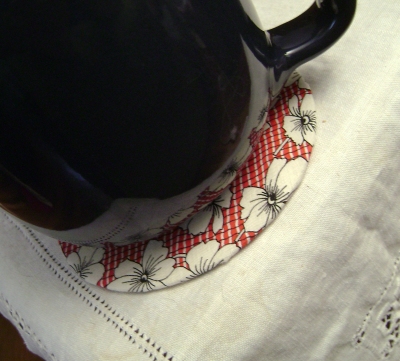
8. Place the CD on the wrong side of the fabric. I put the CD face-side up so it won't show through the top side. The felt or batting will cover up this underside of the coaster soon.
9. Pull on the thread so that the basting stitches tighten the fabric around the CD. When the fabric is snug, sew a few knots to secure your work.

I also run a hot iron around the gathered fabric to flatten the puckers. The CD may buckle slightly from the heat, but it will settle down again in a minute, especially if you lay the coaster right side up and tap it down every few seconds.

10. On the felt or thin batting, trace around the smaller circle and cut it out, keeping inside the line, to create a coaster pad.


For my padding, I wanted to use a white or off-white in case colors bleed when they get wet (as if I ever knock over my drink). Batting doesn't come in many colors, but felt does. So, if you use colored felt, make sure it is colorfast.
11. Center the pad on the underside of the coaster, then sew it on with the matching embroidery floss using the blanket stitch. After taking the last stitch and sewing a couple of knotted stitches to secure my work, I snake my needle between the pad and fabric and bring it up through the pad. Then I snip off the floss. That way, the final tail of the floss is hidden under the padding.


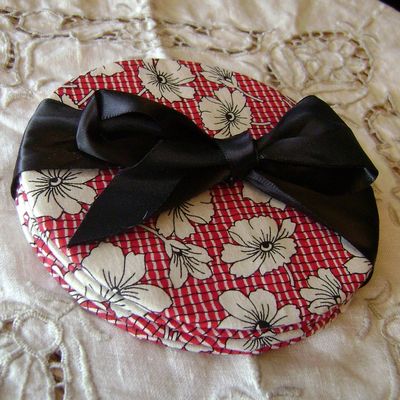
Repeat steps 4-11 for the other coasters. And, voila! A set of CD coasters.
Now, at the time of this writing, I've got a couple sets of these coasters for sale in my Etsy store. So, if you don't want to make the coaster but want some, maybe the ones I've already made will appeal to you.
WOW! These would be great for putting under flower vases or plants too!
ReplyDeleteWow, I absolutely loves these. These are a great idea and wonderful way to use all those left over cds, THANKS!!!
ReplyDeleteArent those nifty! Great tute- very easy to understand.
ReplyDeleteThanks!
that is an awesome and clever idea! i've been stashing those darn cd's in a drawer knowing they would come in handy eventually. yay!! thank you for the tut!
ReplyDeletei've made a couple sets of these coasters while watching tv, lately... i LOVE them! perfect size, perfect toe-able project, LOVE IT! thanks :)
ReplyDeleteThank you for the fantastic idea and tutorial! I have been on the hunt for coasters forever but can't seem to find any I like. Now I can go to Joann's and find the perfect fabric to go with my living room.
ReplyDeleteSo glad I stumbled onto your blog! I was just trying to figure out how I was going to make these! So excited to use up my oversized collection on cds and put them to use!
ReplyDeleteI just tried to download the templates and can't get them.....great idea for how to make some cute coasters.
ReplyDeleteHugs
Naomi
I updated the templates link. I'm sorry for the mixup.
ReplyDelete