Home

Saturday, July 31, 2010

Another reason to love yarn

I'm learning how to crochet. As in, learning the stitches by heart rather than being led step-by-step like I was with the Bucket Bag last summer.*

A week ago, I made this washrag of beauty.

Remedial Crochet Washrag

It had all the basic stitches I needed to commit to memory: how to chain, single and double crochet, and slip stitch. There was even a little half-double crochet thrown in for a bit of whiplash. The pattern is called My Fave Dishcloth by Kathy North.

All that basic crochet swordplay was needed as a prerequisite for a second-level crochet class I signed up for at my local yarn shop. I took the class. I learned not only how to crochet in the round…

Crochet 102 Coaster

A coaster!

…but the pièce de résistance was a beloved Granny Square.

Crochet 102 Granny Square

On just a mechanical level, I see how these things could be addicting. Granny squares are super easy and fast. However, I'm a child of the '70s, and my recollection of granny square blankets is ablaze with harvest gold and avocado green acrylic yarns. And a kind of whimpering orange. The colors make me itch, to say nothing of the petrochemical fiber itself. So, I have this mental block when it comes to a full-on addiction to granny squares. Maybe if I used something like Noro Kureyon or the Lion Brand look-alike, Amazing, then I could crochet piles of squares.

In the meantime, I began a crocheted shawl. Elise Shawl, by Evan Plevinski. I'm using a bamboo yarn called Happy, and that's how it makes me feel because it's lusciously soft.

Elise Shawl begins

Oh, yeah. And it's pink. Normally, not so much my color, but this skein seems to have more power than prissiness in it, so I've made an exception.

I'll post updates to the shawl's progress.

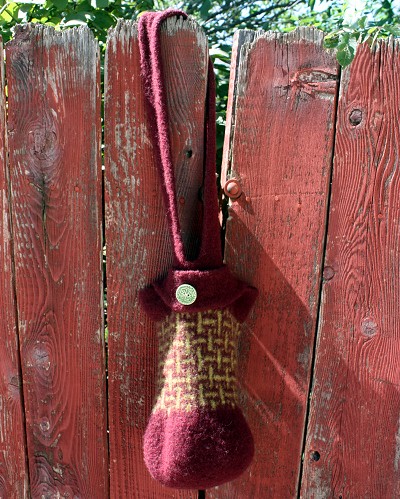
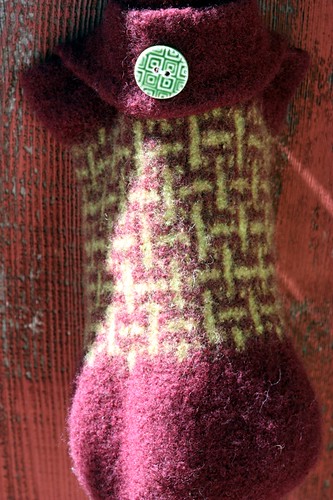
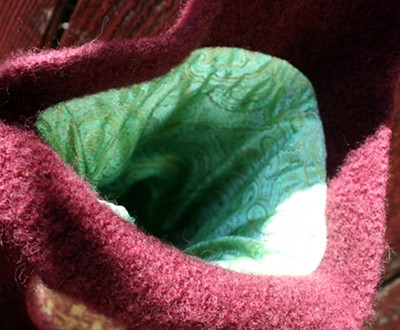
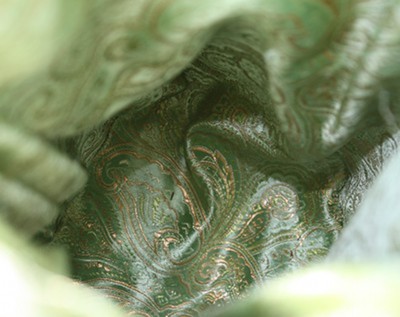
* The crocheted bucket bag from last year. The pattern is in a booklet entitled Enviro-Totes
by Leisure Arts.
Bucket Tote 3

Thursday, July 22, 2010

I was pressing board challenged

…because I don't have room for one in my sewing grotto. I used to have an ironing board, the scissor-legged kind, but I gave it up for more storage room. You see, I'm ill. I have towered stashes of fabric, yarn, and beads. Then I acquired a treadmill that needed a niche, so into a corner it went. This space greed is probably a sickness from which I'll never recover, though I might have a sporting chance if I had a pressing surface on which to flatten the aforementioned fabric and sew it into fabulous creations.

Last year, I rearranged my sewing area and planned to use my UFO cart as the base for a new pressing surface.


(My stepfather-in-law made this for us when we lived in our first house. The kitchen had next to no counter space, and this cabinet was oft dusted with flour or mashed potato flakes.)

I wanted an ironing board that could be removed and that came up to the proper height for me according to the ergonomic guru my quilt guild hosted. I needed about three inches more in elevation.

So, I measured the top of the cabinet and gathered my supplies.


  • 3/4-inch plywood cut to size by the saw master at the big box store.
  • Scrap batting, enough to cover the board's surface in a double thickness. (I used a wool batting because it's what I had. If I'd had big enough pieces in cotton batting, I would have preferred that.  Polyester would melt, of course, and that's a big no-no.)
  • Teflon fabric, enough to fold to the underside of the board on all sides.
  • At least four, small bun feet meant to be screwed in.*
  • At least four straight mounting plate kits.*
  • Staple gun with 1/4-inch staples
  • Electric drill with proper sized drill bit and Philips driver bit, or a really strong hand to work in the screws manually.


*I bought five because I thought I'd need more support in the middle of the board, but the 3/4" plywood is sturdy enough…as long as I don't set my entire fabric stash on top of it.

In keeping with all the tutorials I've read about upholstering a flat surface, I layered the teflon fabric (face down), the two thicknesses of wool batting, and the board on top. I wrapped the teflon fabric around the edges, working one edge and then it's opposite to stretch the fabric tight, and I stapled as I went.


Here's how I folded one corner.


Doesn't that look tidy? The board fits snug inside the lip around the cabinet. I could've stopped there, but it still needed more height. So on with the mounting plates and bun feet.


Voila!


I think one thing I'll add is some no-slip shelf liner cut to fit the bottom of the bun feet.

And, look! More storage space.


Linked up to

Sunday, July 18, 2010

Hanky Haul (Part 2 of What a Bargain!)

At this very moment I'm watching a singer on tv who barely moves her mouth. Ironically, that's what I'm about to do in this post. Writing-wise.

I took lots of photos of hankies. Photos of hankies--at least my photos of them--are not impressive visually. And what did I do to them in post-production? Turned them into Polaroids. Even better.

But that meant I got to write each photo's caption in the large white margin of the "Polaroid" frame, just like when I was a kid. So, without further blabbing, here is the hanky haul in its entirety and a few of the hankies I especially like.  (By the way, the What a Bargain part of this hanky pile is that the hankies were a dime each.  I know!)

Hanky Haul roid

Reverse Applique Hanky roid

Appliqued Hankies roid

Embroidered Hankies roid

Crochet Cutwork Hankies roid

Tablecloth Hanky roid

18th Birthday Hanky

Graphic Floral Hanky roid

Kansas Hanky roid

And as a bonus…

Rick Rack roid

By the way, the free software that converts photos to Polaroid-esque throwbacks is Poladroid.


This post is linked up at

Tuesday, July 13, 2010

A do-over

I interrupt your anticipation for more pictures of my bargain linens motherlode to present a sweater that had been languishing in my cardigan drawer.

Three years ago, I reported the completion of this kimono sweater:

Reading Kimono

What I didn't release was the photo of its disappointing sleeves.

Reading Kimono--first sleeve

Bat wings. Bingo wings. Whatever you call them, I called them unwearable and proved it by not slipping an arm through either one of them from then until now because, now, they look like this:

Vestments Kimono smlr slvs 2

I frogged (unraveled) the sleeves and picked up half the stitches I did before to reknit them.

Now I won't scoop up small mammals when I walk by.

Such as this one in the larger picture…

Vestments Kimono smlr slvs

I know, the sweater looks HUGE. And it is, but not awkwardly so. Some of the width contributes to the drop-sleeve look. The thing I shake my head at now is the collar. So FESTIVE, huh? This is my first sweater, the one I started first, anyhow. I started and finished a second sweater before this one, but both sweaters were predominantly black.  I happened to be in mourning at the time, and colors were a challenge for me for a long time.  Knitting itself was more of a therapy than creative outlet, so I won't take responsibility for color selection; there's just no accounting for it.

In the privacy of my own home, however, I will wear my bright vestment sweater.  At least it's not as ungainly as a Snuggie.


This is linked to

Sunday, July 11, 2010

What a bargain! I think I will buy some. (Part 1)

When the stepmother of a friend passed away, she left behind an impressive collection of vintage linens. They weren't her family's heirlooms; they were simply pieces she'd accumulated over the years from estate sales and the like. My friend has been entrusted with the task of sorting through the stash to sell it, so she asked those of us in her small quilting group if we would like first dibs on what she and her dad had found so far.  (Yeah, so far.  Apparently, my friend's stepmom squirreled away things everywhere, so they're not sure when they will find it all.)

I went to take a look at the assortment last weekend. All the linens are in a spare bedroom, in boxes and on tables and the floor and overrunning the bed. Dresser scarves, table cloths, dish towels, napkins, doilies, hankies (the reasons why I was there), and gobs of other embroidered, embellished, and otherwise spiffied workaday fabric finery were all over, though each and every one of them were arranged in an orderly fashion.

I took home two (2) grocery bags worth of stuff. All for $20. I'll show my hanky haul in a later post, but in this one I want to share what was in a box of handmade trims my friend threw in for thirty cents. There are a few mystery pieces, which I show at the end. If you know what they are, please leave me a comment giving me a heads up.

First, some long pieces of filet crochet.

Filet Crochet Trims

I think some of these are meant for pillowcases. The top, thinner one actually rests better in a circle, so I'm guessing it was meant for a neckline. The two trims wrapped around tubes are tatted. The filet crochet piece between them, with the ribbon running through it, looks like it could be a sachet since it has a front and back and is stitched together around the bottom.

A close up of the tatting.

Tatted Trim

Filet Crochet Butterflies

What does one do with filet crochet butterflies?

Crocheted Bodice

This isn't the mystery piece, but I was puzzled by it. It looks like it could be a bikini top, huh? I wonder if it more likely came from an era when lace adorned dress bodices. Or maybe it's the top of a nightie. Was there a bride somewhere down the corridor of history who didn't get this in her trousseau? (I'm talking out of my ear, of course. I have no inkling what kind of clothing this beautifies.)

Finally, the head-scratcher.

Mystery Filet Crochet

I arranged these four things in a cross just to take the picture. I don't know how they're actually put together. Each one appears to have an upper tab, whether it be pink, blue, or white. One of my friends suggested they are scallops in a larger and never completed piece. She also wondered if they're dresses for a kind of filet crochet Sunbonnet Sue. It all sounds good to me because I am clueless. What do you think? If you don't know, make something up and jot it down in the comments anyway.


I've posted this to

Sunday, July 4, 2010

Happy Independence Day and lessons learned from a bulbous-bottomed bag

A bag I began knitting in February, my Lucy Bag, is done. The bag isn't difficult, but I was disappointed in my little experiment and didn't want to face my deformed creation. A Lucy bag is supposed to look like one of these. Instead, I ended up with this:

Lucy Bag

I knitted a stranded colorwork basket weave in the middle. I had not tried colowork like that before so I didn't know that I would knit it more tightly, apparently, than the rest of my plain stockinette gauge. As a result, the design shrank into a green girdle when I felted the bag. Closer look?

Lucy Bag closeup

It looks like a gourd, no? Well, I was bummed, though not surprised that my full-speed-ahead approach didn't produce something staggeringly beautiful. I sent it to time out for many a moon, but assured it that I wasn't going to let it languish; I bought lining fabric, something slippery since I promised I would use the bag for projects and I don't want the yarn of future shawls and scarves to stick in the bag's gullet.

Lucy Bag liningLucy Bag lining closeup

So, the lessons learned:

  • Use larger needles when switching to colorwork from stockinette, and
  • Trim fingernails before working with slippery fabric. Snag snag snag.

By the way, the button? A ceramic find at Jo-Ann Fabrics. Its colors match much better in person than in photography.


I've linked this post to:

Related Posts with Thumbnails